The fear of a crooked, too-high neckline keeps many men from trimming their own beards. The secret isn’t the common « two-finger rule, » but a professional technique that treats your jawline as an architectural anchor point. By mastering the correct placement and using a combination of tools for sculpting, not just cutting, you can achieve a barber-quality finish at home, saving money while elevating your personal grooming into a genuine craft.
Stepping in front of the mirror, trimmer in hand, is a moment of truth for many men. The goal is a clean, sharp look, but the fear is one slip turning a majestic beard into a patchy disaster, especially around the dreaded neckline. We’ve all seen it: the line that creeps too high, creating an unnatural chin strap, or the one so low it merges into an unkempt neckbeard. Most online advice points to the simple « two-finger rule » above the Adam’s apple as a foolproof guide.
But what if that common wisdom is the very thing holding you back from a truly great beard? What if the secret to a perfect, confidence-boosting neckline isn’t about following a generic rule, but about understanding the unique structure of your own face? This isn’t just about saving time and money on barber visits; it’s about transforming a maintenance chore into an act of personal craftsmanship. It’s about learning to sculpt with precision rather than just cutting away length.
This guide will move beyond the basic tips. We’ll dismantle the process from a master barber’s perspective, focusing on the techniques that separate an amateur trim from a professional sculpture. You will learn not just where to draw the line, but why it belongs there, how to handle different tools for a natural finish, and how to turn even a patchy beard into a statement of style.
We’ve structured this guide to build your skills progressively, from understanding your tools to mastering advanced shaping techniques. Here is what we will cover to turn you into your own best barber.
Summary: Master Your At-Home Beard Trim
- Scissors or Clippers: Which Tool Gives a Natural Finish to a Long Beard?
- Where Should Your Neckline Actually Stop to Avoid the ‘Double Chin’ Look?
- How to Trim a Patchy Beard to Make It Look Fuller and Denser?
- The ‘Wet Hair’ Mistake That Leads to Accidental Over-Trimming
- How to Clean Your Trimmer Blades to Prevent Acne Breakouts?
- The ‘Neckbeard’ Neglect That Ruins a Great Jawline
- Dirty Nails or Scuffed Shoes: Which Detail Destroys Trust Faster?
- Which Beard Style Will Make a Round Face Look More Angular and Masculine?
Scissors or Clippers: Which Tool Gives a Natural Finish to a Long Beard?
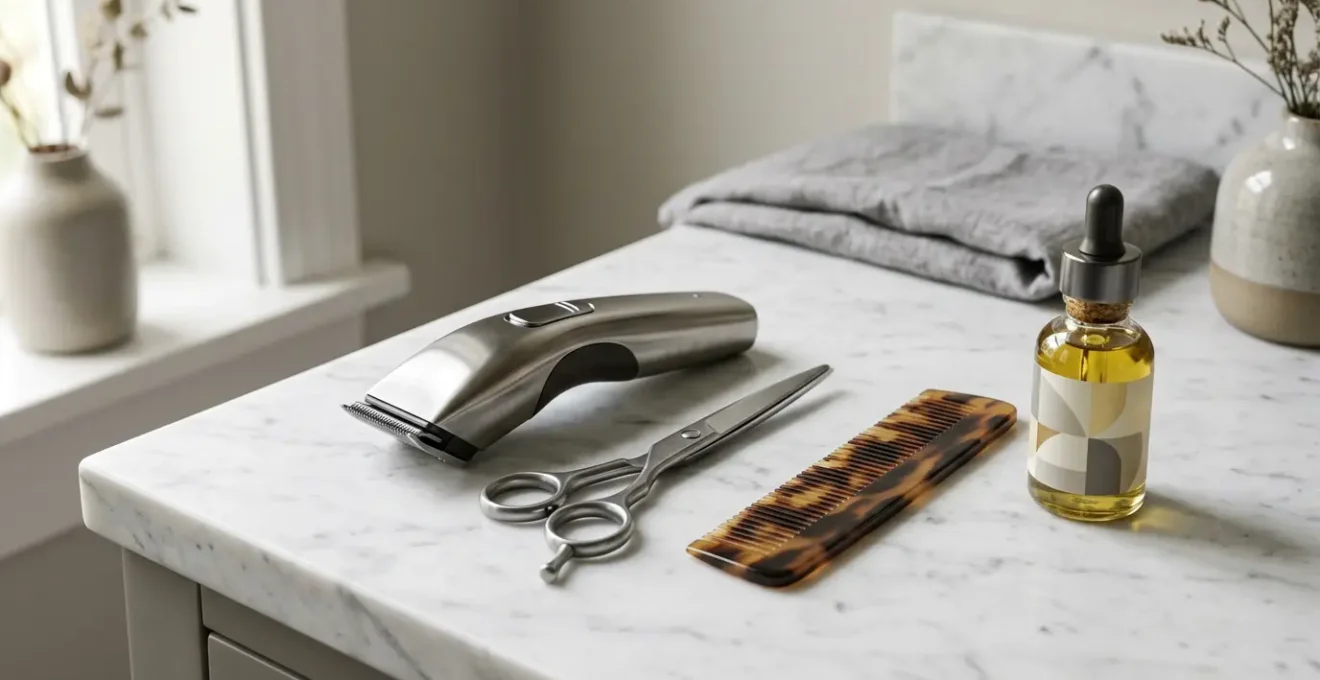
The first decision in your grooming arsenal is the choice of tool. For a long beard, this isn’t an « either/or » question; it’s a « when and how » partnership. Clippers are the workhorse for establishing the foundation, while scissors are the artist’s brush for creating texture and a natural look. Using them in tandem is the key to achieving a professional, non-uniform finish that doesn’t look like a helmet.
Start with clippers and a long guard (e.g., #4 or 12mm) to remove bulk and set your primary length. The secret here is the « descending method »: work your way down through guard lengths in specific areas to create a gentle taper. This prevents the harsh, solid block of hair that screams « DIY trim. » Your clippers create the shape and structure of the beard.
Once the bulk is managed, it’s time for scissors to add finesse. The scissor-over-comb technique is a barber’s staple for a reason. You lift sections of the beard with a comb and snip the hair that sticks out past the comb’s teeth. This blends different lengths seamlessly. For an even softer texture, barbers rely on a specific method. As the Barber Craft Professional Team notes, « They introduce point cutting – a technique where you hold the scissors facing straight up and make small cuts along the bottom edge of your beard to create a more natural look. » This breaks up hard lines and gives the beard movement and life.
Where Should Your Neckline Actually Stop to Avoid the ‘Double Chin’ Look?
This is the single most important question in beard grooming, and the common « two fingers above the Adam’s apple » advice is a dangerously oversimplified rule. A poorly placed neckline can artificially create a double chin or give you an awkward « chin strap » look. The professional approach is to forget arbitrary measurements and instead find your natural jawline anchor point. This is where your head connects to your neck, and it forms the true structural base for your beard.
The Jawline Anchor Point Method vs. The Traditional Two-Finger Rule
Barber Brandon Faulk demonstrates a superior method that avoids the common pitfalls of the two-finger rule. Instead of measuring from the Adam’s apple, he advises finding your natural head-neck connection point. To do this, keep your head in a normal, upright position (never tilted back) and envision a curved line that runs from just behind your earlobes down to this point, which is typically just above the Adam’s apple. This line should follow the natural shadow of your jaw. Trimming along this line ensures the beard acts as a full, properly anchored frame for your face, preventing the illusion of a double chin that a too-high line can create.
To visualize this correctly, stand in front of the mirror with your head level. Don’t tilt your chin up; this stretches the skin and will cause you to set the line too high. The goal is to define the bottom edge of your jawbone, not your chin. The line should be a gentle curve, not a harsh, straight line. This technique ensures that when you move your head, the neckline looks natural and intentional, providing a solid foundation that enhances your jawline’s definition.
As you can see in this demonstration, the proper neckline creates a shadow that strengthens the jaw’s appearance. It’s not about shaving as high as possible, but about creating a clean, deliberate border that distinguishes the beard from the neck. This single detail can dramatically change the perceived shape and strength of your entire face.
How to Trim a Patchy Beard to Make It Look Fuller and Denser?
A patchy beard isn’t a grooming dead-end; it’s an opportunity for strategic sculpting. The key is to create an illusion of density by manipulating lines and directing attention. Instead of trying to grow everything out equally, a smart trim can make your beard appear fuller. This involves keeping certain areas longer to cover sparse spots and creating sharp, intentional lines that give the impression of deliberate style rather than spotty growth.
The most effective strategy is to play with visual weight. If your cheeks are sparse, for example, you can create a lower, sharper cheek line and let the hair on your chin and mustache grow slightly longer. This draws the eye to the denser areas. The same principle applies to patchy sides: by keeping the chin hair longer, you create a focal point that distracts from the thinner areas. A strong, well-defined neckline is non-negotiable for a patchy beard, as it provides a solid foundation that makes the entire structure look more robust.
This approach is gaining popularity, as more men are embracing their natural growth patterns. In fact, despite growth challenges, a study found that 44% of men worldwide sport full beards in 2024, a significant increase from previous years. This shows a cultural shift towards working with what you have. The following table breaks down specific strategies for different patch patterns.
| Patch Location | Trimming Strategy | Visual Effect |
|---|---|---|
| Sparse Cheeks | Lower, sharper cheek line + fade from longer chin to shorter cheeks | Draws focus to fuller areas, creates intentional style |
| Patchy Sides | Keep chin/mustache 2-3mm longer than sides | Creates focal point away from thin areas |
| Uneven Neck Growth | Strong, defined neckline just above Adam’s apple | Provides solid foundation making entire beard appear denser |
| Overall Patchiness | Comb all hair downward, trim for uniform grain | Longer hairs cover sparse spots from above |
The ‘Wet Hair’ Mistake That Leads to Accidental Over-Trimming
One of the most common and unforgiving mistakes in DIY beard trimming is working on wet or damp hair. It seems logical to trim after a shower when the hair is clean and soft, but this is a trap that leads to taking off far more than you intended. Hair, when saturated with water, becomes heavier and straighter, temporarily masking its true length and natural waves or curls.
The science is simple: wet hair appears 10-15% longer than dry hair. As it dries, the hair contracts and springs back to its natural position. That small section you thought you were just neatening up can suddenly become a noticeable patch that’s significantly shorter than the rest of your beard. This is why professional barbers always work on a completely dry beard. They need to see the hair as it will sit naturally throughout the day.
To avoid this pitfall, you must adopt a strict pre-trim protocol. Your beard should be in its final, styled state before any blade touches it. This means washing it, drying it completely, and applying any products like beard oil or balm that you use daily. Combing it into its natural resting position is the final, crucial step. This ensures you are trimming the hair as it actually lives on your face, guaranteeing that the length you see is the length you get.
Your Pre-Trim Preparation Checklist
- Wash your beard thoroughly with a specialized beard shampoo to remove product buildup.
- Towel dry gently by patting (never rubbing) to remove excess moisture.
- Wait a minimum of 30 minutes after your shower for hair follicles to fully contract and hair to dry completely.
- Use a blow dryer on a cool setting if needed, and complete your normal styling routine.
- Apply your usual beard oil or balm and comb the beard into its natural resting position before any trimming begins.
How to Clean Your Trimmer Blades to Prevent Acne Breakouts?
A sharp trim is only half the battle; the other half is hygiene. A dirty trimmer blade is a primary culprit behind skin irritation, ingrown hairs, and acne breakouts along the jawline and neck. Each time you trim, the blades collect tiny hairs, skin cells, and oils. This mixture becomes a breeding ground for bacteria, which you then press back into your skin during your next trim. This is not just a theory; a 2019 study highlighted the issue by finding that 100% of tested men’s beards had high microbial counts, underscoring why tool hygiene is not to be overlooked.
Maintaining hygienic precision is a simple but non-negotiable professional habit. It ensures a cleaner cut, extends the life of your blades, and, most importantly, protects your skin. A quick brush-off after each use is the bare minimum. However, a weekly deep clean is essential for truly sanitizing the tool. This involves disassembling the blades (if your model allows) and using a disinfectant like isopropyl alcohol to kill any lingering bacteria.
Finally, just like any fine-tuned machine, your trimmer needs lubrication. A single drop of clipper oil after cleaning reduces friction, prevents the blades from pulling on hair, and inhibits rust. This entire process takes only a few minutes a week but makes a world of difference in both the performance of your tool and the health of your skin. Think of it as part of the trim itself—the final, crucial step.
The ‘Neckbeard’ Neglect That Ruins a Great Jawline
You’ve defined a perfect neckline, but the job isn’t done. The area just below that line—the upper neck—is where many well-intentioned trims fall apart. Allowing stray hairs to grow unchecked here creates the dreaded « neckbeard, » an area of neglect that visually pulls your jawline down, softening its definition and undoing all your hard work. A clean upper neck provides the negative space that makes your defined neckline pop. It creates a crisp contrast that is essential for a sharp, masculine look.
For men with very dense hair growth on the neck, simply shaving a hard line can look unnatural. This is where advanced barbering techniques come into play, offering a more sophisticated solution than a simple shave. The goal is a subtle, clean transition that looks intentional and polished, not abrupt.
The Professional Micro-Fade Technique for Dense Neck Growth
Instead of creating a single harsh line, professional barbers like Brandon Faulk often implement a « micro-fade » on the neck. This sophisticated technique uses multiple guard lengths to create a gradual, clean transition. They might start with no guard at the lowest point (closest to the Adam’s apple), then use a 1mm guard for the next half-inch, and finally a 2mm guard to blend seamlessly into the main neckline. This gradient looks deliberate and exceptionally clean, maintaining the strong jawline while completely eliminating the unkempt appearance of a neckbeard.
This level of detail sends a powerful message. It shows that your grooming is not an afterthought but a conscious choice. Neglecting this area suggests a lack of attention, whereas a clean, well-managed neck area frames the beard and jaw perfectly, contributing to a powerful and put-together overall appearance. It is the final polish that elevates a good beard to a great one.
Dirty Nails or Scuffed Shoes: Which Detail Destroys Trust Faster?
We often focus on the big picture—the suit, the haircut, the beard itself—but the smallest details often have the largest subconscious impact on how we are perceived. When it comes to first impressions, especially in professional or social settings, it’s the minor grooming missteps that can erode trust and credibility the fastest. While scuffed shoes or dirty fingernails might be attributed to a hard day’s work, a neglected beard neckline sends a different, more personal message.
The impact of grooming on perception is well-documented; workplace studies show that 90% of HR professionals believe good grooming is a critical factor in making a strong first impression. A poorly defined or unkempt neckline falls squarely into this category. It’s not about the length or style of the beard, but about the care taken in maintaining its borders. It signals a lack of meticulousness, a detail that others may subconsciously project onto your professional capabilities or personal standards.
This idea is best captured by an observation from grooming psychology experts, who analyze how these small cues are interpreted. Their professional analysis is stark and insightful:
Scuffed shoes might suggest a long, hard day. Dirty nails might suggest hands-on work. A neglected neckline suggests one thing only: you don’t pay attention to the details you present to the world.
– Grooming psychology expert, Professional image analysis
This quote crystallizes why the neckline is so critical. It’s a detail entirely within your control and visible at eye level during any conversation. It’s a testament to your attention to detail. A sharp neckline doesn’t just shape your beard; it shapes the perception of your character.
Key takeaways
- Ditch the « two-finger rule » for the professional « Jawline Anchor Point » method to define your neckline.
- Always trim your beard when it is 100% dry and styled to avoid accidental over-trimming.
- Use clippers for bulk removal and scissors for texture and a natural, blended finish.
- Regularly clean and oil your trimmer blades to prevent skin irritation and acne breakouts.
Which Beard Style Will Make a Round Face Look More Angular and Masculine?
Once you’ve mastered the fundamental skills of trimming and defining a neckline, you can move on to the highest level of beard craftsmanship: choosing a style that actively enhances your facial structure. For men with a rounder face shape, the goal is to create illusions of length and angularity. The right beard style can add definition to a soft jawline and make the entire face appear more elongated and chiseled.
The core principle is to add vertical length while minimizing width. This means keeping the sides of your beard trimmed relatively short while allowing for more length on the chin. Styles like the Ducktail or a Corporate Beard are excellent for this. Furthermore, the lines of the beard itself can create angles. A cheek line that is a straight, diagonal line from your sideburn to the corner of your mouth, rather than a natural curve, will instantly add more structure. Likewise, a squared-off neckline with sharp corners can add definition that a rounded « U » shape cannot.
Using negative space is also a powerful tool. A clean-shaven neck and sharply defined cheek lines make the beard that remains appear more deliberate and angular. You are essentially using the beard to « draw » a new, more angular jawline on your face. This is where all the skills you’ve learned—from neckline definition to tool usage—come together to create a truly personalized and flattering look.
To help you choose, the following table compares styles known for their ability to add angularity, as also highlighted by a recent comparative analysis of popular styles.
| Beard Style | Visual Effect on Round Face | Key Shaping Technique |
|---|---|---|
| Ducktail | Creates vertical line elongating face | Keep sides short (3-6mm), chin length 2-3 inches |
| Van Dyke | Adds angular definition to jaw | Sharp lines from ear to mouth corner |
| Corporate Beard | Structured appearance with chin emphasis | Squared neckline, diagonal cheek lines |
| Faded Beard | Slims face by removing cheek bulk | Taper from #2 guard on sides to #4 guard on chin |
By applying these principles of shaping, you are no longer just trimming a beard; you are sculpting your appearance with intent and skill. Start today by evaluating your face shape and choosing a style that doesn’t just grow, but is built with purpose.